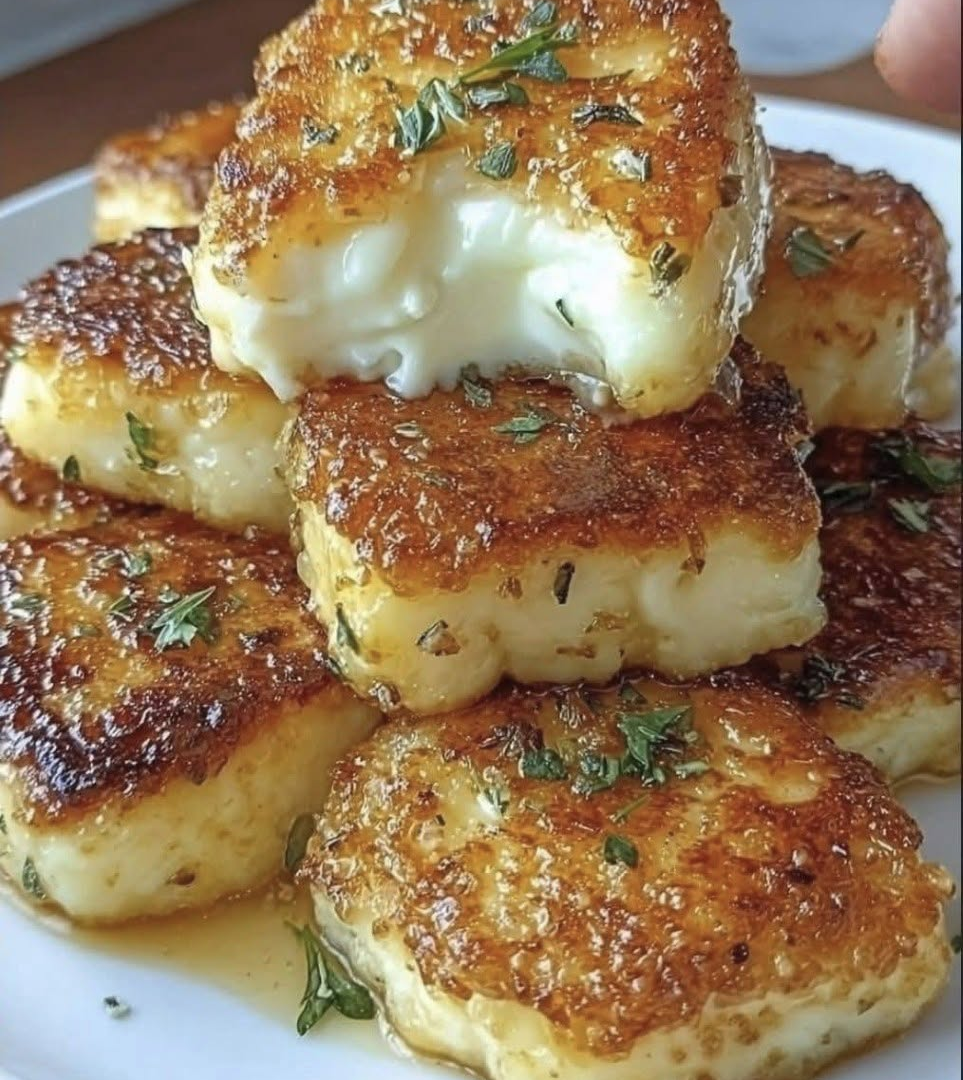
Easy Air Fryer Turkish-Style Layered Bread: Soft, Flaky, Golden, and Perfect for Dipping
If you love bread that is golden and crispy on the outside but soft, tender, and beautifully layered inside, this homemade Turkish-style bread is worth trying.
The bread shown in the image has a wonderfully flaky appearance, with many thin layers that separate when you tear or roll it. It can be served warm with hummus, yogurt, cheese, eggs, soups, grilled meats, vegetables, or almost anything you enjoy with fresh bread.
Although recipes like this can vary considerably across Turkey and the Middle East, the version below is a simple homemade air-fryer adaptation of a Turkish-style layered flatbread. It is not intended to represent one single traditional regional recipe.
The air fryer makes the bread especially convenient because it cooks quickly and produces a beautifully browned surface without requiring a large oven.
Ingredients
For the dough
3 cups all-purpose flour
1 teaspoon salt
1 teaspoon sugar
1 tablespoon olive oil
1 cup warm water, approximately
1 teaspoon instant yeast
For the layers
3 tablespoons melted butter
2 tablespoons olive oil
For finishing
A little melted butter or olive oil
Sesame seeds or nigella seeds, optional
A small amount of water for brushing, if needed
The exact amount of water can vary depending on the flour.
Add it gradually rather than pouring the entire amount in at once.
Step 1: Prepare the Dough
Place the flour in a large mixing bowl.
Add the salt, sugar, and instant yeast.
Mix the dry ingredients together.
Make a well in the center and add the olive oil.
Begin adding the warm water gradually while mixing.
You want to create a soft dough that is slightly tacky but not extremely sticky.
If the dough feels dry and difficult to bring together, add a tablespoon of water at a time.
If it becomes excessively sticky, sprinkle in a little flour.
Avoid adding too much flour because a very stiff dough will produce a heavier, less tender bread.
Step 2: Knead the Dough
Transfer the dough to a lightly floured surface.
Knead it for approximately 7–10 minutes.
You can also use a stand mixer with a dough hook if you prefer.
As you knead, the dough should gradually become smoother and more elastic.
A properly kneaded dough should stretch without immediately tearing.
You don’t need to make it perfectly smooth.
The important thing is developing enough gluten to give the dough structure while keeping it soft.
Step 3: Let the Dough Rest
Place the dough in a lightly oiled bowl.
Cover it with a clean kitchen towel or plastic wrap.
Let it rest in a warm place for approximately 45–60 minutes, or until it has noticeably increased in size.
The exact time depends on the temperature of your kitchen.
A warmer environment will speed up fermentation.
A cooler environment will take longer.
Don’t worry if the dough doesn’t exactly double.
You mainly want it to become softer, lighter, and easier to stretch.
Step 4: Prepare the Butter Mixture
While the dough rests, melt the butter.
Combine the melted butter with the olive oil.
This mixture will be used between the layers.
The fat is important because it helps separate the thin sheets of dough as they cook.
When the bread is torn apart, the fat between the layers contributes to that beautiful flaky texture.
Step 5: Divide the Dough
Once the dough has rested, gently deflate it.
Divide it into approximately 6–8 equal portions.
Roll each portion into a smooth ball.
Cover the dough balls with a clean towel.
Let them rest for another 10–15 minutes.
This second rest is important.
It allows the gluten to relax, making the dough much easier to stretch.
If you try to stretch dough immediately after kneading, it may continually spring back.
Resting solves much of that problem.
Step 6: Roll the First Piece Very Thin
Take one dough ball.
Lightly flour your work surface.
Roll the dough into a thin circle.
You don’t necessarily need to make it paper-thin at first.
Once it becomes relatively thin, gently stretch it with your hands if you’re comfortable doing so.
Be careful not to tear it.
The thinner you can make the dough without creating large holes, the more delicate the finished layers can become.
Step 7: Add the Butter Mixture
Brush a thin layer of the melted butter and olive oil mixture over the surface.
Don’t completely soak the dough.
A thin, even coating is enough.
The purpose is to create separation between layers.
Step 8: Create the Layers
There are several ways to create the layered appearance.
One simple method is to fold the thin dough over itself.
You can fold it into a rectangle, then fold the rectangle again.
Another method is to gently roll the dough into a long strip and then coil it.
Either technique can produce attractive layers.
For a more flaky result, avoid pressing the dough too aggressively after folding.
You want to preserve some of the separation between the sheets.
Step 9: Rest the Layered Dough
Once each piece has been folded or coiled, let it rest for about 10 minutes.
This makes it easier to flatten.
The butter also has a chance to settle between the layers.
Don’t skip this step if the dough feels difficult to roll.
Step 10: Flatten the Bread
Gently flatten one layered dough portion.
Use your hands or a rolling pin.
Don’t press so hard that you completely destroy the layers.
Aim for a thickness of approximately 1/4 inch, depending on how you want the finished bread to look.
If you prefer a softer and thicker bread, leave it slightly thicker.
For crispier edges and more visible layers, flatten it more.
Step 11: Preheat the Air Fryer
Preheat your air fryer to approximately 350°F (175°C).
Air fryers vary considerably, so your particular machine may require a slightly different temperature.
If your model doesn’t require preheating, you can simply begin cooking according to its instructions.
Avoid overcrowding the basket.
The dough needs enough space for hot air to circulate around it.
Step 12: Prepare the Bread for Cooking
Lightly brush the surface with melted butter or olive oil.
If desired, sprinkle the top with sesame seeds or nigella seeds.
You can also leave it plain.
The bread will still develop a beautiful golden color.
If the dough is very dry on the surface, a tiny amount of oil can help with browning.
Step 13: Air Fry
Place the flattened dough in the air-fryer basket.
Cook at approximately 350°F (175°C) for 6–10 minutes, depending on the thickness and your particular air fryer.
Check it after several minutes.
When the surface becomes golden and the edges look crisp, carefully flip it if necessary.
Continue cooking until the second side is also lightly browned and the center is cooked.
Thicker breads may require additional time.
Avoid relying solely on the exact cooking time because different air fryers have different heating patterns.
Step 14: Brush With Butter
When the bread comes out of the air fryer, you can brush the surface lightly with melted butter.
This is optional but gives the bread a softer crust and richer flavor.
If you prefer a crispier exterior, skip the butter or use only a tiny amount.
Step 15: Keep the Bread Soft
Freshly cooked flatbread can lose moisture quickly.
Place the warm bread inside a clean kitchen towel for several minutes.
This allows some of the steam to soften the crust.
If you want the bread to remain particularly soft, stack the cooked pieces and cover them with the towel.
The residual steam helps keep the interior tender.
Why Does This Bread Have So Many Layers?
The layered texture comes from the way the dough is rolled, coated with fat, folded, and flattened.
The butter or oil prevents the sheets of dough from completely sticking together.
During cooking, water in the dough turns into steam.
The steam helps separate the layers, while the outer surface becomes browned and crisp.
That’s what creates the combination of:
Crispy outside + soft inside + flaky layers.
How to Make the Bread Even Flakier
If your goal is a highly layered texture, there are several things you can do.
Roll the Dough Thinly
Thin dough creates more opportunities for layers.
Don’t Overwork the Dough After Folding
Too much pressure can compress the layers.
Use Enough Fat
A very thin layer of butter or oil between sheets helps prevent them from sticking together.
Allow the Dough to Rest
Relaxed dough stretches more easily and is less likely to fight against you while rolling.
Don’t Overcook
Excessive cooking can dry out the interior and make the bread brittle.
Can You Make the Dough Ahead of Time?
Yes.
You can prepare the dough ahead of time and keep it refrigerated.
Place the dough in a covered container and refrigerate it.
Before cooking, allow it to come closer to room temperature so that it becomes easier to stretch.
Cold dough can be difficult to roll because the gluten becomes tighter.
Allowing it to rest makes the process much easier.
Can You Freeze the Bread?
Yes.
These breads freeze well when properly wrapped.
Allow the cooked bread to cool completely.
Separate individual pieces with parchment paper if necessary.
Place them in an airtight freezer-safe container or bag.
When you’re ready to eat them, reheat them in the air fryer.
A few minutes at moderate heat can bring back much of the original texture.
Avoid overheating because the bread can become dry.
How to Reheat Leftover Bread
The air fryer is particularly useful for reheating these breads.
Heat them at a moderate temperature for a few minutes.
You want the bread to become warm without turning hard.
You can also reheat them briefly in a skillet.
A covered skillet can help retain moisture.
The microwave is another option, but it can make bread chewy if overheated.
If using a microwave, a short heating time is usually better.
What to Serve With This Bread
The possibilities are almost endless.
Hummus
Warm flaky bread and creamy hummus make a simple and satisfying combination.
Labneh or Yogurt
Serve the bread with thick yogurt, labneh, herbs, and a drizzle of olive oil.
Eggs
The bread is excellent with scrambled, fried, or boiled eggs.
Use it to scoop up the yolk from a soft-cooked egg.
Cheese
Serve warm bread with feta, fresh cheese, mozzarella, or another cheese you enjoy.
Grilled Meat
It can accompany grilled chicken, beef, lamb, or kebabs.
Vegetables
Pair it with roasted vegetables, tomatoes, cucumbers, olives, peppers, and fresh herbs.
Soup
The bread is also excellent alongside lentil soup, tomato soup, bean soup, or another hearty soup.
Make It Savory With Herbs
You can add herbs between the layers.
Try:
Parsley
Dried oregano
Thyme
Mint
Za’atar
Black pepper
Don’t add too much, because large amounts of fresh herbs can make the layers harder to handle.
A small amount can provide plenty of flavor.
Add Garlic
For garlic bread lovers, mix a little finely minced garlic into the butter and olive oil.
Brush it lightly between layers.
You can also brush garlic butter onto the finished bread.
Be careful with fresh garlic because it can brown quickly at high temperatures.
Make a Cheese-Filled Version
If you want something more substantial, add a small amount of cheese between the layers.
Feta is particularly good with herbs.
Mozzarella creates a stretchy filling.
Cheddar produces a richer flavor.
Don’t overfill the bread.
Too much cheese can leak out during cooking and make the air-fryer basket messy.
Can You Make It Without Yeast?
Yes.
There are yeast-free versions of Turkish-style layered flatbreads that rely on resting and thin rolling rather than fermentation.
A yeast-free version will generally have a somewhat different texture.
It may be flatter and more pastry-like.
If you want the soft, bread-like texture shown in the recipe above, yeast can be helpful.
Common Problems and How to Fix Them
The Bread Is Too Hard
You may have added too much flour or cooked it too long.
Next time, keep the dough softer and reduce the cooking time slightly.
The Bread Is Raw in the Middle
The dough may have been too thick.
Flatten it more or reduce the temperature slightly while extending the cooking time.
The Layers Don’t Separate
The dough may not have been thin enough, or insufficient butter or oil was used between layers.
Make the sheets thinner and use a light, even coating of fat.
The Outside Burns Too Quickly
Your air fryer may run hotter than the temperature displayed.
Lower the temperature slightly and cook for a little longer.
The Dough Keeps Shrinking
It probably needs more resting time.
Let it sit for another 10–15 minutes before trying to roll it again.
The Bread Is Dry
Avoid overcooking.
Also, don’t use excessive flour when rolling.
A softer dough generally produces a more tender finished bread.
A Simple Version of the Recipe
Ingredients
3 cups flour
1 teaspoon salt
1 teaspoon sugar
1 teaspoon instant yeast
1 tablespoon olive oil
About 1 cup warm water
3 tablespoons melted butter
2 tablespoons olive oil
Method
Mix flour, salt, sugar, and yeast.
Add olive oil and warm water gradually.
Knead until soft and elastic.
Cover and rest for 45–60 minutes.
Divide into 6–8 balls.
Rest again for 10–15 minutes.
Roll each piece very thin.
Brush lightly with butter and oil.
Fold or roll to create layers.
Flatten gently.
Preheat the air fryer to about 350°F (175°C).
Brush the top lightly with butter or oil.
Air fry for approximately 6–10 minutes, checking frequently.
Flip if needed.
Cook until golden and fully cooked.
Cover briefly with a clean towel before serving.
Final Thoughts
This Turkish-style layered bread is a wonderful example of how a few basic ingredients can become something that looks and tastes much more complicated.
The secret isn’t an unusual ingredient.
It’s the dough, resting time, thin rolling, layering, and controlled cooking.
The air fryer makes the process especially convenient, giving the bread a beautifully golden exterior while keeping the inside tender.
Serve it warm with hummus, yogurt, cheese, eggs, vegetables, grilled meats, or your favorite soup. You can keep it simple with butter and salt or turn it into a more flavorful version with garlic, herbs, cheese, or spices.
Once you understand the basic technique, you can adjust the thickness and layers to create exactly the texture you like.
Crispy edges, soft layers, a buttery aroma, and bread that’s best enjoyed warm—this is an easy homemade recipe worth making whenever you’re craving something comforting.