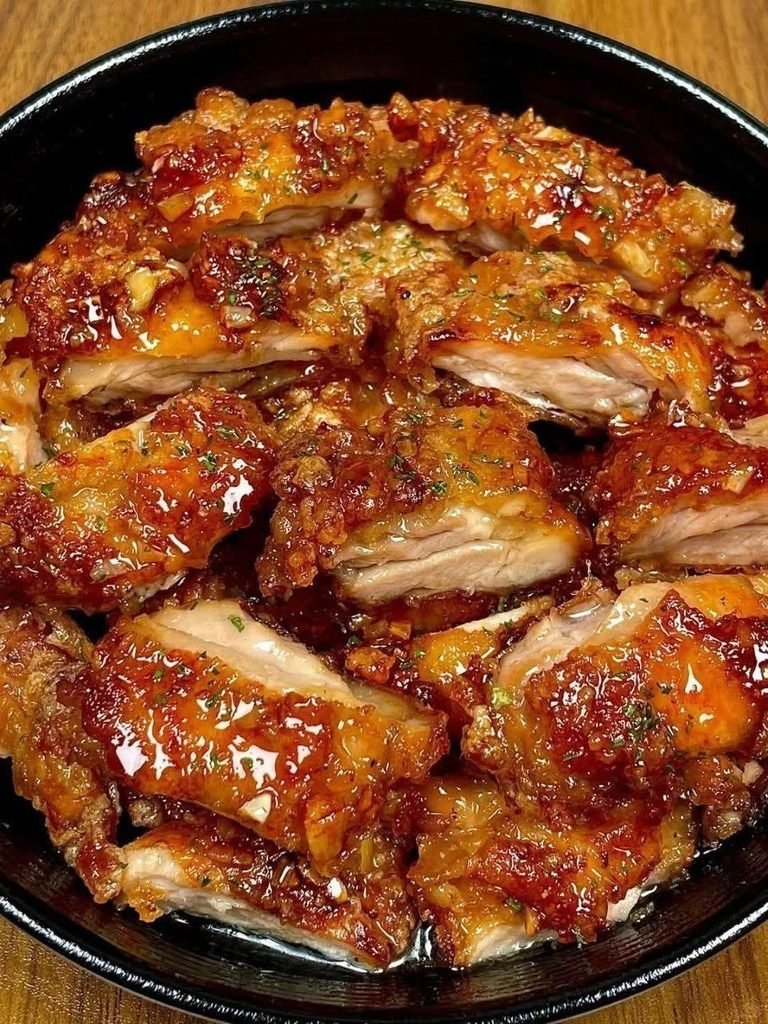
I made this for dinner last night and WOW—the whole family was fighting over the last piece! The chicken came out crispy on the outside, juicy and tender inside, and coated in a glossy honey garlic sauce that was absolutely irresistible.
If you’re looking for an easy dinner that feels special without requiring complicated ingredients, this is one to save. The combination of golden crispy chicken, fresh garlic, honey, and a savory seasoning creates a delicious balance of sweet, salty, garlicky, and slightly caramelized flavors.
The best part is that the chicken stays incredibly juicy while the outside develops that beautiful golden crust.
Why You’ll Love This Recipe
There are plenty of chicken recipes out there, but this one has everything you want in a family dinner.
The chicken is:
Crispy on the outside
Juicy and tender inside
Sweet and savory
Packed with garlic flavor
Easy to prepare
Made with simple ingredients
Perfect for busy weeknights
Delicious with rice, potatoes, or vegetables
The honey garlic glaze is what really makes this recipe special. As it cooks, the honey becomes glossy and slightly caramelized, coating every piece of chicken with a flavorful sauce.
And once the garlic hits the hot pan, your kitchen will smell amazing.
Ingredients
For the chicken:
2 pounds boneless, skinless chicken thighs
1 teaspoon salt
1 teaspoon black pepper
1 teaspoon paprika
1 teaspoon garlic powder
½ teaspoon onion powder
½ teaspoon smoked paprika
½ cup all-purpose flour
2 tablespoons cornstarch
2 tablespoons olive oil
1 tablespoon butter
For the honey garlic sauce:
⅓ cup honey
4–5 cloves fresh garlic, finely minced
2 tablespoons soy sauce
1 tablespoon apple cider vinegar or lemon juice
1 tablespoon butter
½ teaspoon paprika
¼ teaspoon black pepper
2 tablespoons water
For garnish:
Fresh chopped parsley
A small sprinkle of sesame seeds, optional
Sliced green onions, optional
Choosing the Right Chicken
Chicken thighs are especially good for this recipe because they contain more fat than chicken breast.
That extra fat helps keep the meat moist and flavorful while it cooks.
You can use boneless, skinless thighs for easy cutting and serving, but bone-in thighs can also work. If using bone-in pieces, you’ll need to adjust the cooking time because they take longer to cook through.
Try to choose chicken pieces that are relatively similar in size. This helps them cook evenly.
If some pieces are very large while others are small, the smaller ones may finish cooking before the larger pieces.
Step 1: Prepare the Chicken
Start by patting the chicken thighs dry with paper towels.
This step may seem small, but it’s important.
Removing excess moisture from the surface helps the seasoning and coating stick better and makes it easier to develop a crispy exterior.
Place the chicken on a cutting board and trim away any large pieces of excess fat.
Then cut particularly large thighs into smaller pieces.
You can leave smaller thighs whole if you prefer, but cutting them into smaller portions makes them easier to cook and serve.
Step 2: Season the Chicken
In a small bowl, combine:
Salt
Black pepper
Paprika
Garlic powder
Onion powder
Smoked paprika
Sprinkle the seasoning mixture evenly over the chicken.
Use your hands or tongs to make sure every piece is coated.
Allow the chicken to sit for about 10 minutes while you prepare the coating.
This gives the seasoning a little time to settle into the surface of the meat.
Step 3: Make the Crispy Coating
In a shallow bowl, combine the flour and cornstarch.
The cornstarch is a particularly useful addition because it helps create a lighter, crispier exterior.
Coat each piece of seasoned chicken in the flour mixture.
Shake off any excess.
You want a thin, even coating rather than a thick layer of flour.
Place the coated chicken pieces on a clean plate while you heat your pan.
Step 4: Heat the Pan
Place a large skillet over medium-high heat.
Add the olive oil and allow it to heat for a minute or two.
Add the butter.
Once the butter melts and begins to foam slightly, carefully add the chicken.
Don’t overcrowd the pan.
If you put too many pieces in the skillet at once, the temperature can drop and the chicken may steam instead of becoming crispy.
If necessary, cook the chicken in two batches.
Step 5: Cook Until Golden and Crispy
Place the chicken pieces into the hot pan and allow them to cook without constantly moving them.
Let one side develop a deep golden-brown crust before turning.
Depending on the size of the chicken pieces, cook for approximately 4–6 minutes on the first side.
Then turn each piece and continue cooking until the other side is golden and the chicken is cooked through.
The exact cooking time will depend on the thickness of the chicken pieces and the temperature of your pan.
The safest way to check is with a food thermometer.
Chicken should reach an internal temperature of 165°F (74°C) at the thickest part.
Once cooked, transfer the chicken to a plate.
Don’t worry if the chicken isn’t perfectly glazed yet.
That’s coming next.
Step 6: Make the Honey Garlic Sauce
Reduce the heat to medium.
In the same skillet, add the minced garlic.
Cook it for about 30 seconds, stirring constantly.
Be careful not to burn the garlic.
Burned garlic can become bitter very quickly.
Add the honey, soy sauce, vinegar or lemon juice, paprika, black pepper, and water.
Stir everything together.
The mixture should begin to bubble gently.
As it cooks, the sauce will become thicker and more glossy.
The honey provides sweetness and caramelization, while the soy sauce adds savory depth.
The vinegar or lemon juice provides a little acidity to balance the sweetness.